Protect your saddle from dirt, scuffs and scrapes with a pair of Stirrup Savers. Our stirrup cover pattern features an elastic top to keep them securely in place.

To sew a tail bag you will need:

– Polar Fleece fabric
– 12mm elastic
– Matching thread
– A sewing machine
– An overlocker (optional)
– Tape Measure
– Scissors
– Pins

Cutting your stirrup savers and elastic

Cut two rectangles 25 cm x 60cm
cut out fleece for stirrup savers

Then cut two 30cm lengths of 12mm wide elastic.

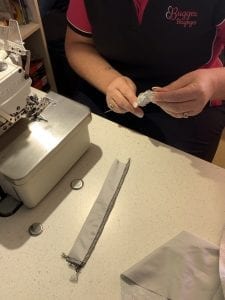
Sewing your Stirrup Savers

1. Fold each rectangle of fleece half lengthways. Pin together if required.

2. Sew both side seams. Repeat with other stirrup saver.
sew side seams of stirrup savers

3. Optional – overlock the top edge of the stirrup savers.
optional

4. Fold the top edge over 4-5cm and sew, leaving a 2cm gap to thread the elastic.

5.Thread the elastic through and tie, leaving a 6cm tail.

6. Turn inside out and you’re ready to use your Stirrup Savers! To fit, simply pull on over your stirrup iron before running your stirrups up through your stirrup leathers.

Tail bags can be used for a variety of reasons, the most common being to keep the tail clean, free from tangles and debri and to encourage hair growth.

To sew a tail bag you will need:

Spandex/Swim fabric – This is the best choice as it is moisture wicking, fast drying and unlike some fabric does not cause static in the tail.
– Matching thread
– A sewing machine
– An overlocker (optional)
– Scissors
– Pins

tail bag materials required

Cutting out your tail bag

First, you need to work out what size you need for your horse and cut one piece of fabric 32cm wide by the length needed (If you have an extra thick tail you can widen your tail bag)
Mini – 50 cm (you will need to cut 55cm length to allow for seam allowance)
Short – 60cm (you will need to cut 65cm length to allow for seam allowance)
Medium – 70cm (you will need to cut 75cm length to allow for seam allowance)
Long – 80cm (you will need to cut 85cm length to allow for seam allowance)

Next, Cut 2 pieces 6cm wide and 17cm long (these will become the ties)

Sewing your tail bag

1. Take one tie piece and fold in half lengthways, with the pattern on the inside. Pin together if required.

2. Sew one of the short ends then sew the long side.

3. Repeat steps 1 & 2 for the other tie.

4. Turn the ties in the right way, I find a knitting needle the quickest way to turn them right side out.

5. On the short side of the tail bag piece, attach the ties on the open end and evenly spaced (pin before sewing if you require).

6. Fold the edge over and do two rows of stitching.

7. Fold  tail bag in half lengthways, with the pattern on the inside. Pin together if required.

8. Sew the length of the tail bag and the bottom seam

9. Turn inside out

10. You’re ready to use your tail bag. You can follow our instructions on how to tie in a tail bag.