Protect your saddle from dirt, scuffs and scrapes with a pair of Stirrup Savers. Our stirrup cover pattern features an elastic top to keep them securely in place.

To sew a tail bag you will need:

– Polar Fleece fabric
– 12mm elastic
– Matching thread
– A sewing machine
– An overlocker (optional)
– Tape Measure
– Scissors
– Pins

Cutting your stirrup savers and elastic

Cut two rectangles 25 cm x 60cm
cut out fleece for stirrup savers

Then cut two 30cm lengths of 12mm wide elastic.

Sewing your Stirrup Savers

1. Fold each rectangle of fleece half lengthways. Pin together if required.

2. Sew both side seams. Repeat with other stirrup saver.
sew side seams of stirrup savers

3. Optional – overlock the top edge of the stirrup savers.
optional

4. Fold the top edge over 4-5cm and sew, leaving a 2cm gap to thread the elastic.

5.Thread the elastic through and tie, leaving a 6cm tail.

6. Turn inside out and you’re ready to use your Stirrup Savers! To fit, simply pull on over your stirrup iron before running your stirrups up through your stirrup leathers.

Tail bags can be used for a variety of reasons, the most common being to keep the tail clean, free from tangles and debri and to encourage hair growth.

To sew a tail bag you will need:

Spandex/Swim fabric – This is the best choice as it is moisture wicking, fast drying and unlike some fabric does not cause static in the tail.
– Matching thread
– A sewing machine
– An overlocker (optional)
– Scissors
– Pins

tail bag materials required

Cutting out your tail bag

First, you need to work out what size you need for your horse and cut one piece of fabric 32cm wide by the length needed (If you have an extra thick tail you can widen your tail bag)
Mini – 50 cm (you will need to cut 55cm length to allow for seam allowance)
Short – 60cm (you will need to cut 65cm length to allow for seam allowance)
Medium – 70cm (you will need to cut 75cm length to allow for seam allowance)
Long – 80cm (you will need to cut 85cm length to allow for seam allowance)

Next, Cut 2 pieces 6cm wide and 17cm long (these will become the ties)

Sewing your tail bag

1. Take one tie piece and fold in half lengthways, with the pattern on the inside. Pin together if required.

2. Sew one of the short ends then sew the long side.

3. Repeat steps 1 & 2 for the other tie.

4. Turn the ties in the right way, I find a knitting needle the quickest way to turn them right side out.

5. On the short side of the tail bag piece, attach the ties on the open end and evenly spaced (pin before sewing if you require).

6. Fold the edge over and do two rows of stitching.

7. Fold  tail bag in half lengthways, with the pattern on the inside. Pin together if required.

8. Sew the length of the tail bag and the bottom seam

9. Turn inside out

10. You’re ready to use your tail bag. You can follow our instructions on how to tie in a tail bag.

tail-care-tips-for-healthy-tail

Your horse’s tail length and condition is determined by four factors; nutrition, their environment, genetics and the care you provide. Below are some tips to consider to get your horses tail in top condition.

1. Healthy hair comes from the inside out. If your horse is not receiving proper nutrition, no amount of magic potions or conditioners will improve your their coat, mane and tail. To ensure your horse gets the most nutrional value from his feed, be sure to maintain a good parasite control regime.

2. Rubbing destroys tails, protect your horse from anything that may cause their tail to itch. Keep your horses underbelly, sheath or udder and fold between the hind legs clean as itching in these spots (where your horse can’t scratch) can cause tail rubbing. Using strong cleaning products or insect bites can also lead to serious rubbing.

3. Don’t brush your horse’s tail every day, once a week is enough. Although it looks nice when it is brushed out, if you brush it every day, it will gradually get thinner and thinner. It takes years to re-grow each long strand of hair that is pulled out.

4. Use grooming tools designed for tails. Use only long, wide-toothed combs, starting at the bottom and comb out small sections at a time while working your way up the tail to minimise hair loss or breakage. Hold the hair firmly in your other hand while you comb so that if you hit a tangle you won’t pull the hair out.

5. Keep your horse’s tail clean and moisturised, but only wash when necessary. When washing, pre-mix shampoo with water as detergent residue causes itching if not rinsed thoroughly. Over washing will dry your horse’s tail causing it to tangle and break. If your horse’s tail is dirty or his skin is dry, he will rub his tail to relieve the itching that is caused by both. If you are showing and use gel or products to smooth down the short hairs at the top of the tail, wash the tail thoroughly when you are finished. These products are drying and may cause your horse to rub his tail to relieve the itching.

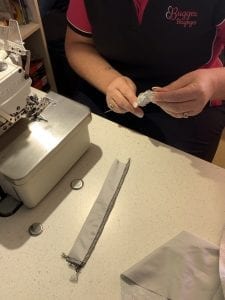
6. Use a tailbag. Tail bags reduce breakages and keep their tail protected from manure, sun, bedding and mud. Available in two types, Plait in (three tubes) and tie in (one tube) tail bags are designed to be used BELOW the dock.
tail-bag-buggez-bugeyes

Buggez Bugeyes makes both lycra plait in and tie in tail bags to prevent breakage, available in four lengths. Shop our tail bags.

As a safety precaution, stand beside your horse when you groom his tail, not directly behind him. Even if your horse has never kicked at you in his life, you never know when something might startle him.

Looking after your horses tail is an opportunity to spend quality time with your horse. With your busy life, you may not have time to hand pick objects out of your horse’s tail one at a time everyday, but you should still make every moment with your horse a quality one.